Shelf Layouts for OO Gauge: What Actually Fits on 12 Inches of Wall Space
A 12-inch shelf will hold a proper OO gauge layout, but only one kind. The honest dimensions for shunting planks, why a continuous run needs 30 inches of depth, and the benchwork that actually fits.

Most shelf layout articles tell you a shelf layout is a brilliant way to use a small space, then show you a photo of something that’s clearly sitting on a four-foot-deep table. The word “shelf” is doing a lot of quiet lying in this corner of the hobby.
A real shelf, the kind you’d actually screw to a spare room wall, is somewhere between 9 and 12 inches deep. That’s the constraint worth designing around, because it’s the one most people are genuinely working with. The question isn’t whether you can build an OO gauge layout on it. You can. The question is which kind, and that single decision settles almost everything else before you’ve bought a yard of track.
The depth decides the layout, not the other way round
There are really only two layouts that work on a 12-inch shelf in OO, and they’re separated by whether the train ever needs to turn around.
If the train runs from one end to the other and back, point-to-point, you can do a great deal in 9 to 12 inches. Shunting planks, a small terminus, a goods yard, an industrial branch. All of these are end-to-end designs where the track stays roughly parallel to the front edge, and none of them ask the rails to curve through anything sharper than a gentle bend into a siding.
If the train needs to go round and round, you’ve got a problem the shelf can’t solve, and it comes down to the return curve at each end. To send a train back the way it came, you need a 180-degree turn, and an OO 180-degree turn is far deeper than people expect.
Here’s the maths, because it’s the whole argument. A continuous loop’s end curve is a semicircle, and the depth it occupies is roughly twice the radius of that curve. Peco’s tightest Setrack curve, first radius, has a radius of 371mm. Two of those back to back gives you 742mm of depth, which is a shade over 29 inches, before you’ve added any clearance for the train overhanging the curve or any scenery in front of it. Move up to the more sensible second radius at 438mm and the turn alone wants about 35 inches of depth.
So a continuous run in OO needs a board closer to 30 inches deep than 12. That isn’t a shelf. That’s a table, or a wide baseboard on brackets, and there’s no clever track plan that gets around it. The geometry is fixed.
The radius reality check
While we’re on Peco’s figures, they’re worth keeping in front of you, because shelf builders are the people most tempted to drop to a tighter radius to make something fit.
The four Setrack radii in OO are: first radius at 371mm (14.6 inches), second at 438mm (17.25 inches), third at 505mm (19.9 inches), and fourth at 572mm (22.5 inches). Those numbers are to the centre of the track, so the actual board needs more than that on each side.
First radius looks generous on paper and runs badly in practice for anything with bogies. A four-wheel wagon and a short tank loco will get round it, but a bogie coach or a modern diesel will either bind, overhang comically, or both. First radius is a train-set curve, fine under the Christmas tree, wrong for a layout you want to look at in good light. My cousin, who handles the scenic side of our spare room layout, refuses to have first radius anywhere visible, and he’s right; the overhang ruins the photographs even when the running is acceptable.
Second radius (438mm) is the honest minimum for general OO running, and it’s already too wide for a 12-inch shelf to host as a curve. Which loops you right back to the same conclusion: on a shelf, you don’t curve the main line at all. You keep it straight and let it run off the end into a fiddle yard.
What actually fits: the end-to-end shelf
Once you accept that the train comes in one end and leaves the other, the 12-inch shelf opens up considerably.
A shunting plank like an Inglenook fits in 4ft x 1ft with room to spare, and it’s the most operationally rewarding thing you can do in the depth. A small terminus station with two platform roads, a run-round loop, and a goods siding will sit on a board around 6 to 8 feet long and 12 inches deep, which is a long thin shelf but a perfectly buildable one. An industrial setting, a single line serving a couple of factories or a wharf, asks for even less.
The trick that makes all of these work is the fiddle yard at one or both ends, and it doesn’t have to live on the same 12-inch shelf. A removable cassette, a sector plate, or a simple traverser can hang off the end of the board, or fold down, or lift away entirely between sessions. That’s where the trains that aren’t currently on scene wait their turn, and it’s what turns a static diorama into something you operate.
Depth, then, isn’t the enemy of operation. It’s only the enemy of the continuous loop. Plenty of modellers spend years on an end-to-end shelf and never miss watching a train chase its own tail.
Benchwork: three ways to build the shelf itself
The board under the track matters more on a shelf than on a table, because a shelf is cantilevered off a wall and every gram of weight is hanging on those brackets. Three approaches cover almost everything.
A hollow-core door is the classic cheap shortcut, and for good reason. It’s flat, rigid, light, and you can often get a damaged one free from a building site or a skip. A standard internal door is around 30 inches wide, so you’d rip it down the length to get a 12-inch strip, or use the full width if your shelf allows. The one real drawback is wiring. The inside is a cardboard honeycomb with timber only around the edges, so you can’t snake a dropper wire down through the middle the way you can with a framed baseboard. You either surface-mount the wiring underneath in trunking, or you rout a shallow channel in the top before you lay track. Worth knowing before you commit, not after.
Extruded foam insulation board, the Celotex or Kingspan sort, is the lightest option going and my own preference for a shelf. A 50mm sheet is stiff enough to span between brackets with a thin timber edge frame to stop the ends sagging, and it weighs almost nothing. You can carve straight down into it for a stream, a cutting, or a below-track industrial pit, which is harder work on a solid top. Track pins won’t hold in foam, so you glue the track down with a flexible adhesive rather than pinning it. For a shelf this is a genuine advantage, because the whole assembly stays light on the wall.
A timber frame with a thin ply top is the traditional answer and the strongest. A simple frame of 2x1 (or 44mm x 18mm) softwood with a 6mm or 9mm ply top gives you a board you can drill, pin, and wire through anywhere. It’s heavier than the other two, which matters on brackets, but for a fixed shelf that isn’t coming down it’s the one that will still be flat in twenty years. For a shelf, keep the frame shallow; you don’t need 4-inch-deep framing under a board that’s only carrying a couple of locos and some scenery.
Whichever you pick, the brackets carry the real responsibility. Use proper heavy-duty L-brackets rated well above the load, fixed into studs or with cavity fixings that mean it, spaced no more than about 16 inches apart. A baseboard coming off the wall is the one failure mode that destroys stock rather than just annoying you.
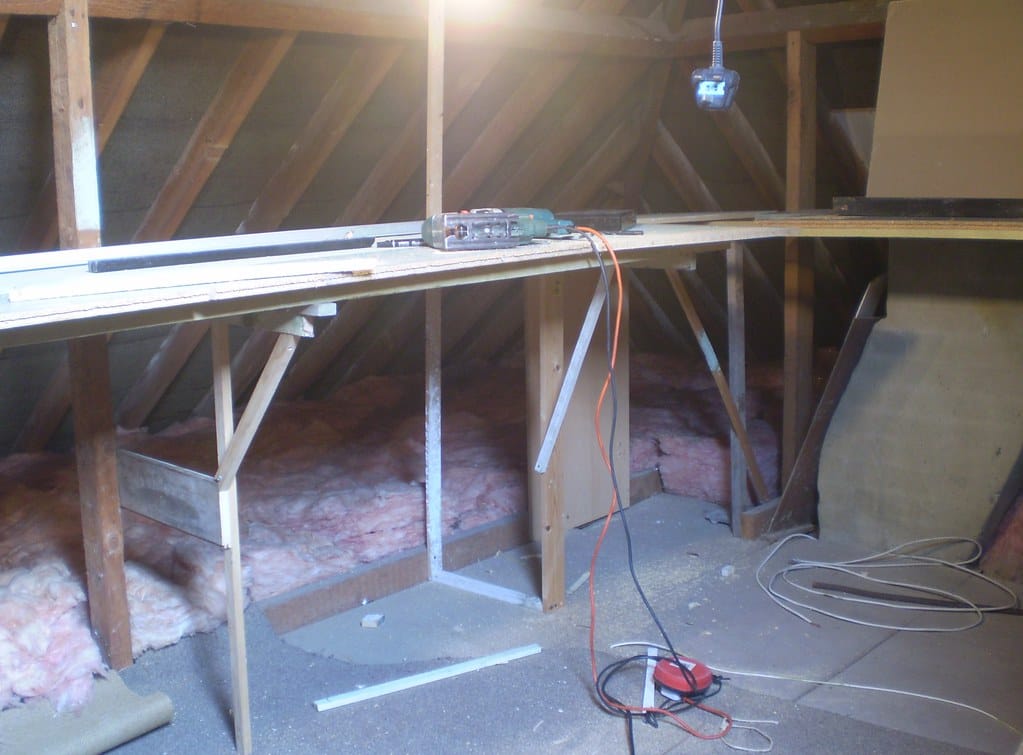
A timber-framed baseboard under construction. For a shelf this depth, a light frame with a thin ply or foam top is more than strong enough.
Fixed or fold-down
If the shelf is permanent, fixed brackets are simpler and steadier, and there’s nothing to go wrong. If the room has to do other jobs, a fold-down board on a piano hinge along the wall batten lets you drop the whole layout flat against the wall when it’s not in use. The catch with fold-down is that anything not glued down hard will move, so scenery has to be built solid and stock has to come off before you fold it. For a shunting plank that gets used in short sessions, fold-down is a reasonable trade. For a finely detailed terminus, fixed is kinder to the work.
What not to attempt on a shelf
A continuous oval. It’s the first thing everyone wants and the one thing the depth forbids, for the reasons above. Trying to force one in on first-radius curves gives you a board that’s neither a proper shelf nor a proper layout, and the running disappoints on the tight ends.
A double-track main line, for the same reason doubled. A large through station with multiple platforms and scenic approaches at both ends, which wants length you can have and width you can’t. And anything that depends on big sweeping curves for its look, because those curves are exactly what won’t fit.
The shelf rewards the opposite instinct. One line, one purpose, a clear operating sequence, and scenery that does the heavy lifting because there isn’t room to hide behind track. My uncle, who knows the LMS goods workings of the early 1950s far better than I do, keeps pointing out that the prototype ran enormous amounts of traffic through cramped yards and single sidings, and that a believable small layout is closer to how the real railway actually looked than a big roundy-roundy ever is. A shelf pushes you towards that whether you meant to go there or not.
So measure the wall first, settle the one decision that matters, and let 12 inches tell you what to build.
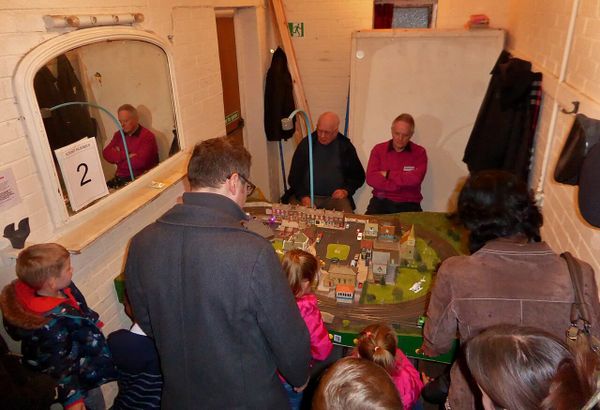
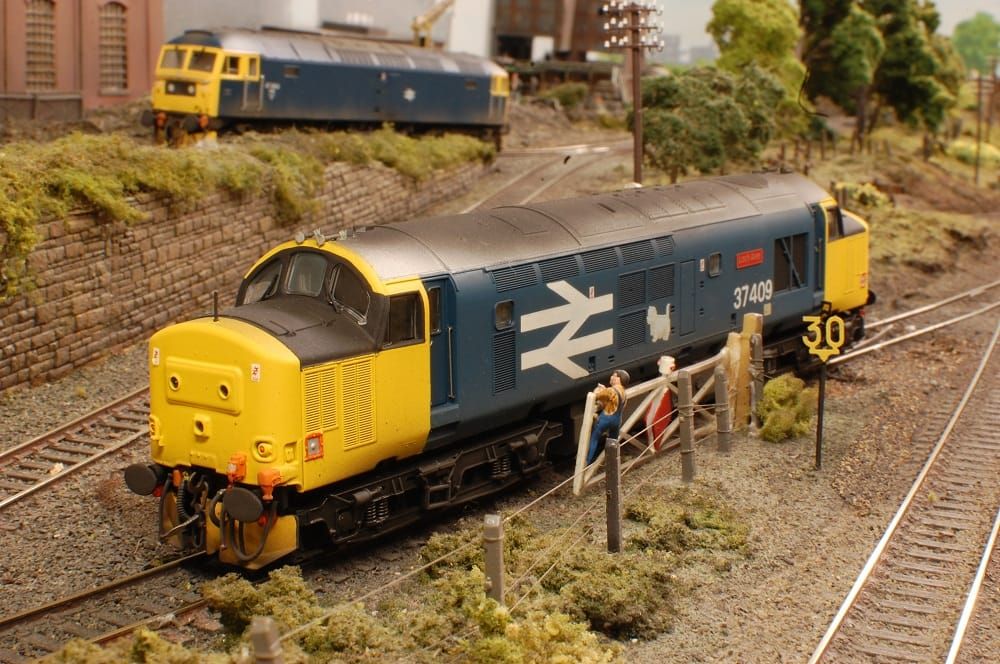
A compact OO gauge scene built around a single industrial line. This is the shape a shelf rewards: one line, one purpose, scenery doing the work.