Planning a Small OO Gauge Layout: The 6 Questions to Answer Before You Buy a Single Piece of Track
Most OO gauge layout mistakes happen before a single piece of track is laid. Answer these six questions in order and you'll build something you can actually run trains on — and expand later.

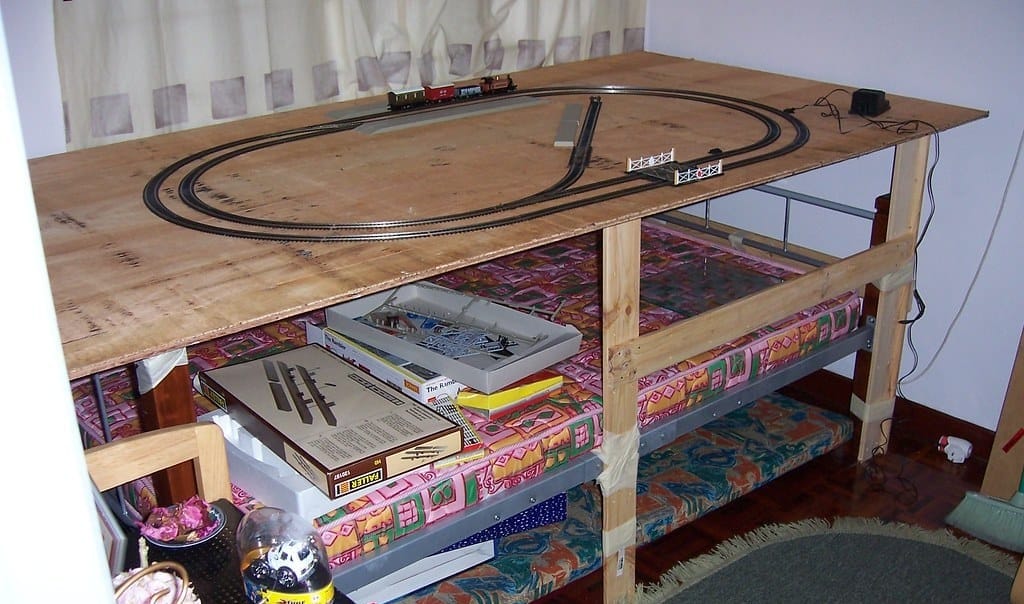
Tom had the room measured in his head long before he got the tape out. “About ten feet,” he told himself, which sounded perfectly workable for an oval and a small goods yard at one end. He ordered the Setrack, bought a half-sheet of ply for the baseboard, and spent a Saturday evening transferring his graph-paper plan onto the wood. The oval needed 1.2 metres (about 4ft) across. The room turned out to be 2.7m (just under 9ft) door to window, minus a radiator that nobody had accounted for, minus the bookcase that wasn’t moving, minus the 450mm (18in) of access aisle his wife pointed out he’d actually need to reach the back. The plan, as drawn, needed to come up.
It’s one of those situations that feels like bad luck but is almost always the result of the same handful of questions being skipped or answered too quickly. The track wasn’t the problem. The product knowledge wasn’t the problem. Six decisions had simply been made by default rather than on purpose, and by the time the baseboards were cut, those decisions were already done.
There are six of them, and they need answering in order. Each one constrains the next. Get them right before anything is purchased and the layout that follows builds predictably. Get them wrong and you end up relaying track that should never have gone down in the first place.
Question 1: What space do you actually have?
Get a tape measure before you open a browser, because “I’ve got a spare room” is not a measurement. “I have a 2.4m x 2.1m (8ft x 7ft) room with a door that swings inward on the north wall” is a measurement, and it is the only kind that produces a working track plan.
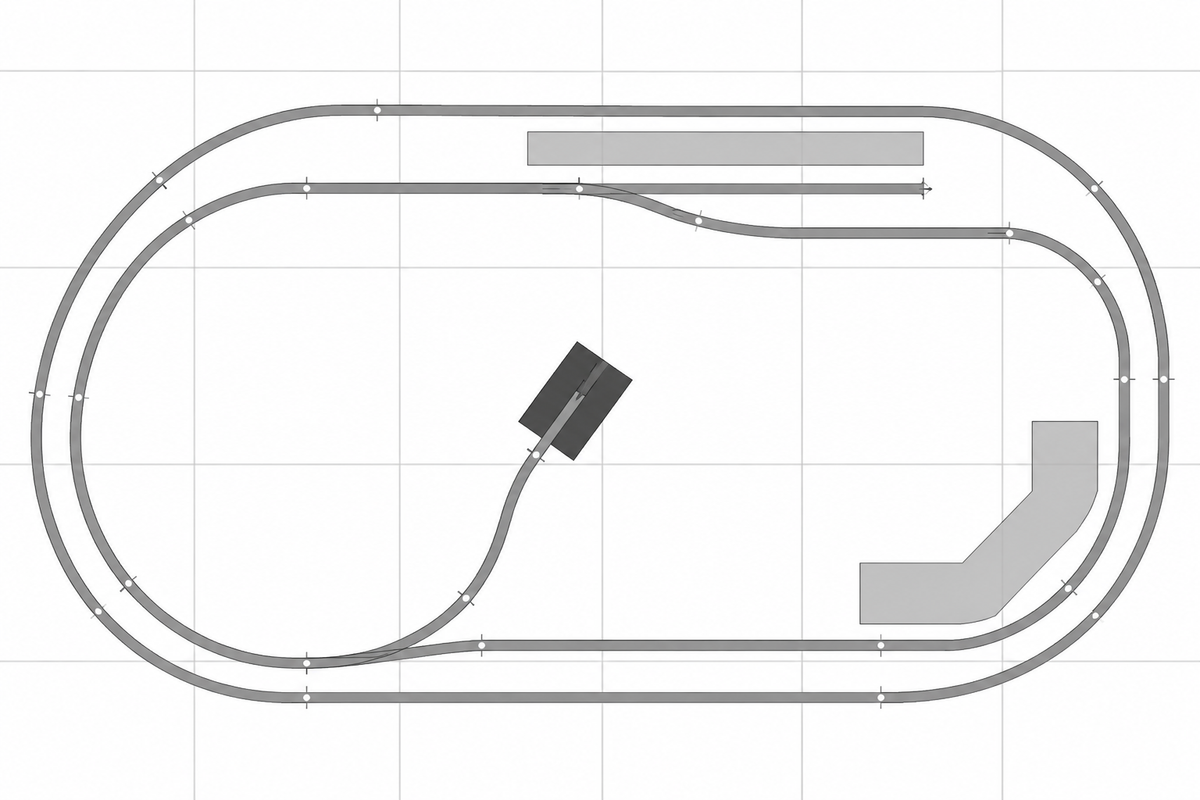
OO gauge is 1:76 scale running on 16.5mm track, and it needs more room than people expect. The critical constraint is curve radius. Peco Setrack comes in three radii: 1st radius at 371mm (about 14⅝in), 2nd at 438mm (17¼in), and 3rd at 505mm (about 20in). The 1st radius figure sounds usable until you find that most ready-to-run locomotives with a longer wheelbase will stall, bind, or derail on it. That covers anything with a six-coupled chassis or a bogie. 2nd radius (438mm / 17¼in) is the practical minimum for a general-purpose layout, and 3rd radius (505mm / 20in) looks significantly better on inside curves where you can see the overhang.
For a continuous oval using 2nd radius Setrack, the minimum baseboard footprint is roughly 4ft x 3ft (1.2m x 0.9m). That sounds small, and it is small. Once you add a passing loop or a goods siding, 5ft x 3ft (1.5m x 0.9m) is a more workable starting point.
Measure your available floor or table area and then subtract 450mm (18in) on each side you need access from, because you cannot reach comfortably across more than about 600mm (2ft) without doing your back in over a period of years. If you are building against a wall, you lose access from that side entirely, which pushes all maintenance to the front edges. Write down the usable dimensions before you do anything else, because that number controls every layout plan that follows.
Measure the room before you design the layout. What looks generous on paper often shrinks fast once you account for access aisles and furniture.
Question 2: Continuous run or point-to-point?
This is the most consequential choice in small layout design, and it is also the one most beginners get wrong by defaulting to “oval because that is what starter sets come with.”
A continuous run (oval or folded figure-of-eight) lets a train run indefinitely without operator input, which has obvious appeal when you just want to watch locomotives in motion. It also wastes a significant amount of baseboard area on the return curves at each end, which are pure geometry and contribute nothing to the visual scene.
A point-to-point layout has a terminus at each end, with trains departing from one station, travelling to the other, and returning. This more accurately represents how real branch lines operated, and it also allows the two end scenes to dominate the composition, which often produces more interesting modelling. The trade-off is that it requires active operation: you have to drive the train, reverse it, and manage any shunting yourself.
For small spaces, a single-track point-to-point with a run of 4 to 6ft (1.2 to 1.8m) between buffer stops and a passing loop somewhere in the middle is often more satisfying than a continuous oval because you can fit more usable track in a given length of baseboard. If you genuinely want a continuous run, Peco’s 2nd radius Setrack produces a credible oval on a 4ft x 3ft (1.2m x 0.9m) board. The Peco ST-100 Setrack Starter Set includes enough curved and straight track for the basic oval plus two turnouts, at approximately £40, and that is a reasonable proof-of-concept purchase to lay on the floor before you commit to building baseboards.
Question 3: What era and prototype?
“Era and prototype” is how the hobby defines what railways you are modelling and when. For UK modellers, the standard reference is the NMRA/British Railways timetabling system, but in practical terms you are choosing a period and a region.
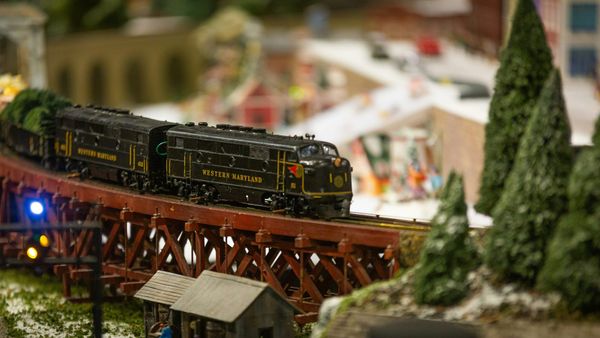
This matters for equipment compatibility in ways that are easy to underestimate. A locomotive from 1935 looks wrong next to a diesel multiple unit from 1965, and rolling stock lettered “British Railways” does not belong on a layout set before nationalisation in 1948. More importantly for beginners, different eras have very different levels of ready-to-run availability. The British Railways steam era from roughly 1948 to 1968 is the best-served period in OO gauge, with new releases from Hornby, Bachmann, and Rapido appearing every year.
My uncle, who handles the historical research for our layout, makes this point clearly: pick an era you can actually research, which means finding photographs, working timetables, and at least one reliable reference book. Without that, you end up with a plausible-looking layout that falls apart under any scrutiny. For most people starting out, the period around nationalisation (late 1940s to early 1950s) or the mid-British Railways steam era (mid-1950s to early 1960s) gives the right combination of historical interest and product availability.
Do not mix eras on a first layout. It sounds obvious stated plainly, but it is extremely easy to buy a locomotive because it looks attractive without checking whether it fits the period you have defined. Set a range of five to ten years and hold it.
Question 4: Operations-focused or scenic display?
A layout built for operations is designed around working turnouts, realistic shunting movements, and prototypical train consists, with scenery treated as secondary. A layout built as a scenic display prioritises appearance: detailed backscenes, careful ground cover, convincing buildings, and operations as a bonus.
Neither is the correct approach. They produce very different layouts, built in different sequences, with different priorities for time and budget.
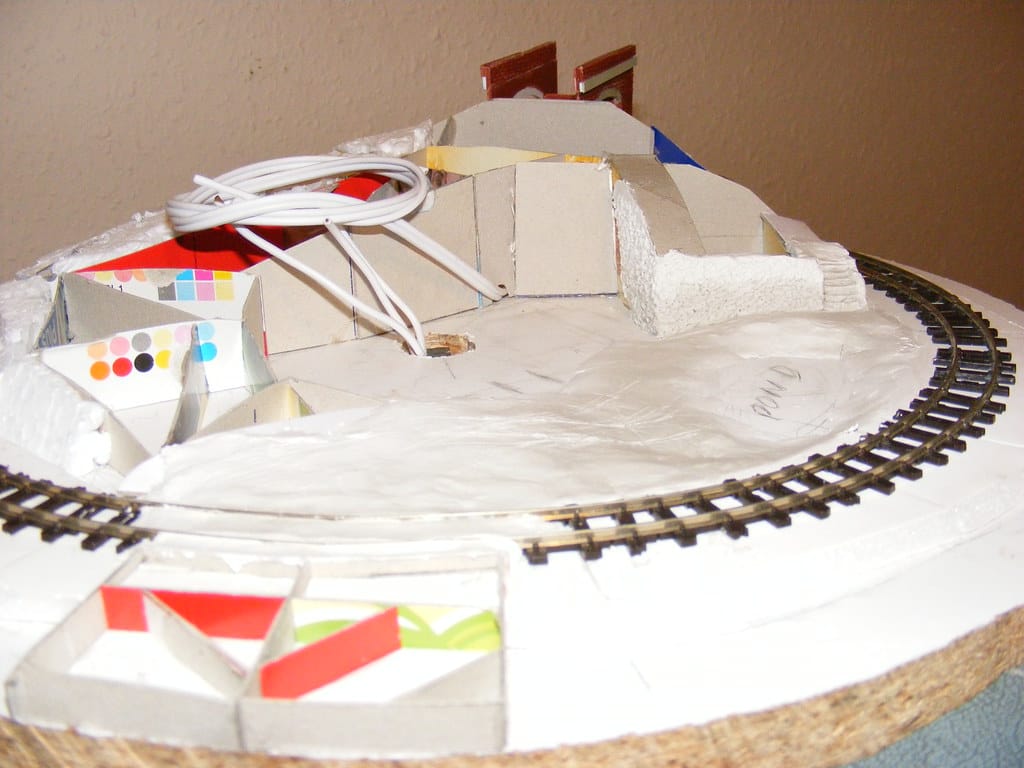
Operations-focused layouts need well-laid, reliable track above everything else, with points correctly aligned, check rails properly set, and rail joints flush. You can build a perfectly functional operations layout with no scenery at all: plain grey ballast, minimal ground cover, functional buildings. Many exhibition layouts operate exactly this way backstage in the fiddle yard.
Scenic display layouts tolerate slightly more operational compromise, but they need patience with slow-drying scenic materials, a good eye for colour, and ideally some experience in groundwork. My cousin handles all the scenery and painting on our layout, and her contribution is that scenic work takes at least three times longer than beginners expect, particularly on slopes, rock faces, and water features.
Most beginners want both, which is fine, but start with operations. Get the track running reliably before any scenic material goes down, because glue, plaster, and scatter adheres to every surface including rail heads, and fixing scenic contamination on a partially built layout is miserable work.
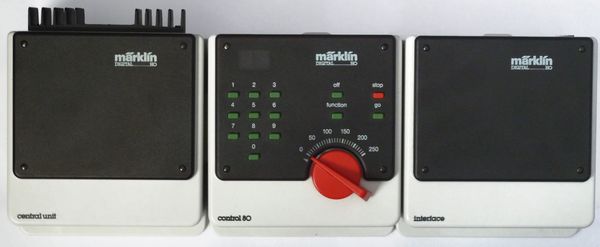
Question 5: DC or DCC from the start?
This question has a clear answer for anyone planning a layout with more than one locomotive running simultaneously, or anyone who wants sound: start with DCC. Installing it retro-fitted to an existing DC layout is possible, but it involves rewiring, removing DC controller connections, and potentially re-chipping locomotives already fitted with budget DC-only mechanisms, and it is not a quick job.
For a single locomotive running in circles, DC is simpler and cheaper to set up. A basic DC controller costs around £20 to £30 and requires no decoders in the locomotives, but the limitations arrive quickly. You cannot run two locomotives independently on the same section of track, sound effects require separate decoders regardless, and consist operation (multiple locomotives on one train) needs additional wiring.
DCC gives each locomotive its own address, so the controller sends a digital signal down the track and each locomotive’s decoder reads its own address and responds independently. This allows two or three locomotives on the same circuit with separate speed and direction control, sound functions, and lighting all handled from one place.
The entry cost for DCC is higher. The NCE PowerCab is a solid starter system at approximately £200 from Rails of Sheffield, handles most small layout requirements, and expands later with accessory decoders for points and signals. For UK beginners who want the simplest introduction to DCC without unnecessary complexity, it is the system I would suggest starting with, because the interface is clear and consist setup is straightforward.
The ESU ECoS that I run on our layout is a more capable system with a touchscreen interface and comprehensive feedback support, but at a higher price point, and it is not the right starting point for someone building their first layout.
If you are building for operations with more than one locomotive from day one, start with DCC. The incremental cost per locomotive for a decoder is £15 to £25 for a straightforward chip installation, so budget for that from the beginning.
Question 6: What is your first module?
A module is a discrete, self-contained section of baseboard, and even if you are planning a permanent layout that will eventually fill a room, your first build should be a single module: manageable in size, complete in itself, and informative about every decision you will face later.
The practical size for a starter module is 4ft x 2ft (1.2m x 0.6m) or 5ft x 2ft (1.5m x 0.6m). That is large enough to contain a basic scene with some track complexity, small enough to move on your own, and narrow enough to reach across without difficulty.
For the track plan on a first module, a loop with a single passing siding is more useful than a bare oval because it requires two turnouts, which means you learn how to wire and align points before you have committed to a large baseboard. If a point causes derailments, it is much easier to diagnose and fix on a 4ft (1.2m) module than on a fully built 10ft x 6½ft (3m x 2m) layout where access is compromised from the start.
The Peco ST-100 Setrack Starter Set at 2nd radius is the sensible starting track choice for this module, because it includes two turnouts and gives you enough geometry to plan a basic loop-and-siding before you purchase additional track. If your space comfortably accommodates 3rd radius curves, the Peco ST-101 set gives you the same starting geometry at the wider radius, and the trains look noticeably better rounding the corners.
Build one module to the point of running trains reliably, then plan the next one. This approach consistently produces better layouts than planning the full scheme on paper, buying all the track at once, and discovering in week three that the geometry does not fit.
A single starter module with a loop and one passing siding is enough to test track geometry, wiring, and your scenery approach before committing to the full plan.
Running through the six in sequence
The order matters because each answer limits what the next question can sensibly return. Space defines what track geometry is possible. Track geometry determines whether a continuous run fits at all. Era constrains which stock you buy. The operations-versus-scenic preference shapes how you allocate build time. DC or DCC determines the wiring standard for the entire layout. And the first module is where all of those decisions meet the baseboard for the first time.
Answer them out of order and the early decisions start undermining the later ones. I was told an old saying when I was a child which is appropriate here.... 'Measure Twice, Cut Once'.